Showing posts with label accessories. Show all posts

Monday, April 23, 2012

March and April... Shake and Make

Hey all... alive here...

So I've decided to do 3 posts that get me caught up. At this point I either get back up to date or stress myself out about making detailed posts about every single thing I have done in March and April (not going to happen...). To be honest, this has been a fantastic lesson in itself. I think I will feel really good about just getting caught up and back on track. I apologize for the lack of detail and when I get a chance I will come back and elaborate. In the meantime, if you have questions about what something is or how I made it or what links are... please comment and I will let you know. Here we go!

In this post I am just going to upload pictures of things that I have made over the last two months (honestly I do not remember the exact dates.) Also... there are more so I will continue to add pictures. Some things I gave away so I will have to find a way to get pics. Thanks for your patience! 

Photo I took at my sister's house. Edited with Instagram iPhone app.  
Made this crocheted wrap bracelet for my sister for her birthday.

This crocheted wrap bracelet for St. Patty's Day!

Made this T-shirt scarf for a friend for St. Patty's Day


This is an old braided leather belt that I strung chain
through and added a finished end and a snap.
Crocheted hippie headband with a large button for added pizzaz!
Flexible metal ring with gold string wrapped for a summer wrap bracelet!

Another crocheted headband with large button.
4 different kinds of chain connected to create a staggered necklace.
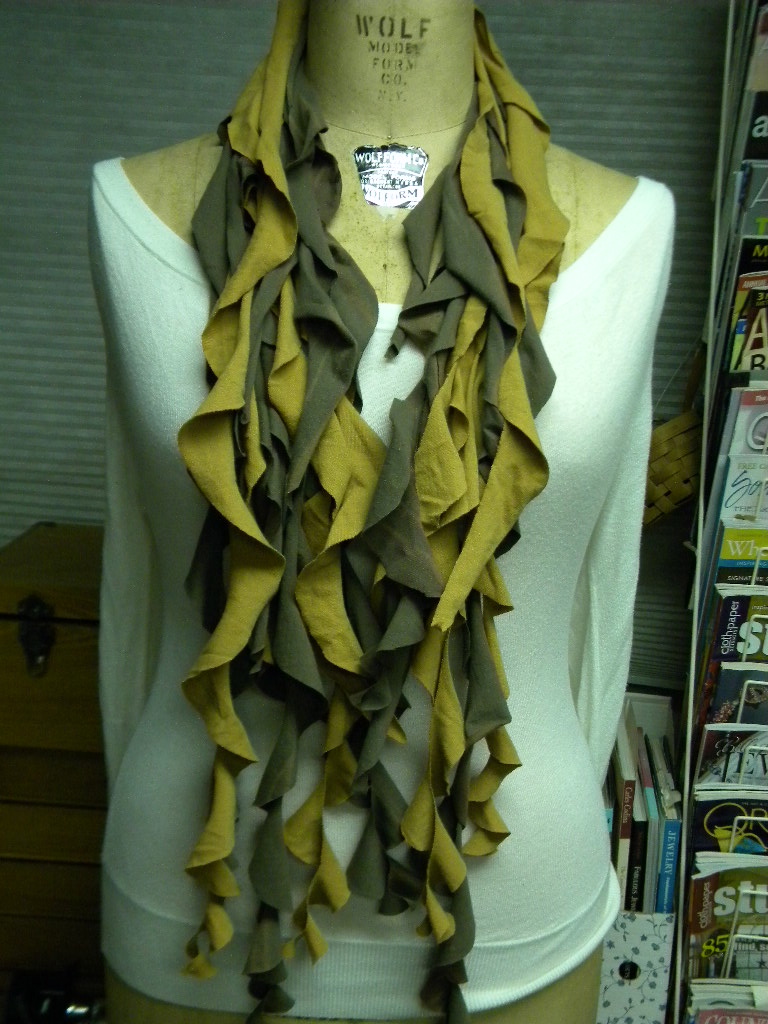
Green and brown T-shirt scarf - kickin' it old school.
Part of a chain cut, leaving 2 rings with gold string wrapped for a wrap bracelet.

Green t-shirt necklace - crocheted part doubles as a headband.
Crocheted summer wrap bracelet with metal bead.
Crocheted wrap bracelet with pear-like bead for closure.

Old belt made into mens cuff with the word "possible" stamped in. Made this for a friend who shares the obsession with all things possible!

Two strips (soon to be cuffs) made from sewing scraps sewn together.
This is really cool and is made using water soluble paper! Link to come. 
This is a small bag (maybe used for cosmetics?) made by ironing old plastic shopping bags together.
The designs are pieces of yarn and small cutouts of words from magazines. I put them between the plastic bags that I ironed together. After ironing it all together I sewed a button on for closure :)

This is made of strips of magazines woven together and then taped in place using clear packing tape. I think I could use it for the cover of a notebook or as a placemat? Other ideas?? I have 3 of them.
This is a simple old industrial chain with strips of leather from my dad's shop
 woven though it. It makes a cool wrap bracelet.
Simple yellow T-shirt headband.

This is a close-up version of a T-shirt scarf. I don't love it but it is something I wanted to try to do for a while. Instead of weaving one shirt I took 2 different shirts and wove them together. I think I would like this one better if I had the lighter color on the inside. Thoughts?

This is a sampling of all of the leather belts that I have scored. Time to make more stuff from leather belts! I swear I'm not a hoarder! My mother taught me to always claim "collector." :)

Sunday, January 22, 2012

January 19, 2012: The cutting edge


Yes! T-Shrits again! More to come too... ahhhahhhahhhaa. Many people are going crazy for this one. The good news is that it is easy breezy so you can whip this one up in a matter of minutes. All you need is:

  • 2 large T-shirts (a cool color combination)
  • Something circular (10-12in... or 25-30cm in diameter - a dinner plate would work)
  • A pencil to trace the circles
  • scissors
That is all! I'll do my best to explain...

  1. Start by spreading the T-shirts out on a table, front side down- smooth any wrinkles.
  2. Use the plate to trace 4 circles on the back of each shirt, if you can fit that many (try not to trace over a collar or hem... or major designs... if you don't want them to be part of your scarf)
  3. Cut each of the circles out (cut through both sides of the shirt, giving you 2 circles for each cut)
  4. If you did 4 cut-outs for each shirt you should end up with 16 total circles. 
  5. Pile the circles from the same shirt on top of each other (2 piles, one from each shirt)
  6. Cut the circle in a spiral - do this for each T-shirt pile of circles
  7. Separate the strands from each other and arrange them in a pleasing way. 
Just like the other T-shirt scarf, I will probably post my own tutorial video... but in the meantime... here is the site that I used to learn. Happy Re-Teeing!

January 18, 2012: Tearin' it up!

This is one of my favs! I always like doing different things with old T-shirts... and I guess that stems back to when my friends and I were in high school and we would go to thrift stores on a regular basis looking for the most beat-up and funky T-shirts we could find. As a result... I have a plethora of Ts. That, of course, does not stop me from buying more. Bag sales! Why not, when you can up-cycle to amazing accessories such as these?

How did I make it... hmmm. This one just might need a video or picture tutorial because it would be hard to explain in writing. I posted it to my Pintrest board for my creations and it is spreading like wildfire...So stay tuned, I will definitely follow up with a tutorial. Until then... just cut up those shirts and yank on the pieces, braid them and twist them until you have something fabulous!

Monday, January 16, 2012

January 14, 2012: It's a Wrap!

Today I revisited an old project that just did not end up quite right. To make this wrap bracelet originally, I took apart an old, black, braided leather belt. I took one of the strips of leather and hammered it and stretched it until it straightened out a bit. Once it looked straight and had the "worn" look that I was going for, I painted over the strip with turquoise acrylic paint. Once the paint dried I took either side of the strand in my hands and stepped my foot on the middle of the strand with the painted part hitting the bottom of my shoe. Then I moved the strand side to side, scraping it on the bottom of my shoe to make the paint peel and rub away. This gave it an old, beat-up look, which I love! When the strip of leather had the look I was going for it was time to figure out how to close the bracelet on my wrist. I punched holes in either end of the leather strip and added a rivet reinforcement. At the time, I added a silver chain and a crab-claw clasp. This was very difficult to close around my wrist. So, the bracelet sat around and I stared at it once in a while wondering how I could make it easier to close so I could wear it. Well, when I was in NYC recently I found some magnetic clasps. This was the answer to my dilemma! So now I am excited because my bracelet is much easier to take on and off :). I will probably be producing a bunch of these in the near future so stay tuned for an Etsy or Facebook link to purchase one if you are interested!

Tuesday, January 3, 2012

Welcome 2012!

Welcome New Year!! This New Year's Eve I was struck with a memory of several New Years ago. My mother made the lofty goal to create an artist trading card every day for a year. By the next New Year's Eve, she had accomplished her goal. A binder, full of 365 artist trading cards will live on to commemorate her year of creativity and discipline. Inspired by this story and a growing library of books I have been reading, fueled by my passion for creating and learning, I have set out to either create something new or learn something new each day in 2012. In keeping with the Period Ten theme, my "new thing" each day will have to be something I am interested in learning/doing/creating... that is not a part of my work day. Please comment and/or share something new you have created or learned! I hope you enjoy each new something :)