Showing posts with label DIY. Show all posts

Tuesday, February 21, 2012

February 8, 2012: It's a bird... It's a plane... Its JERSEY!

(First, let me apologize... I am falling a bit behind with updating you on my creations! Gasp! - Life... what can ya do?) 
I have always been interested in new ways to recycle old magazine pages. They are so colorful and fun but the darn things pile up and up and up! While browsing DIY stuff on YouTube, I came across this neat idea for a recycled magazine necklace. 

I didn't really have a ton of time so I just played around with the idea, rolling and gluing, rolling and gluing. I wrapped some paper around the abstract shape that I came up with and poured some of the resin over it.
When it dried I picked it up and saw... JERSEY!? I did not even mean to make it :)

With Flash

I decided it would make a wonderful key chain so I drilled a hole in the resin. Then I strung a piece of wax linen cord through the hole and attached a key ring. Ta-da! Recycled magazine Jersey key chain!

Saturday, February 11, 2012

February 2, 2012: Keepin' Tabs


This one is cool because I picked it up from kids at school. I think the National Art Honors Society has been making them and selling them for fundraising. (Not sure about that one... but I did hear that from a student and I have seen these around on multiple occasions - in and out of school.) I was having a difficult time thinking of something to make today and realized that I had wanted to try this. I had a coffee can full of tabs so that was that. I do, however, have a knack for making things slightly more difficult than they need to be... and here's how I did it this time. I was not fond of the shiny silver look of the tabs so I decided I would try to oxidize them a little using liver of sulfur (technique discussed in January 16 creation). Well... I put about 30 tabs into a small amount of the oxidizing agent and it got interesting. It started making this metallic looking solution and started bubbling! I thought I was going to blow something up. Ugh. I let them sit in there a while, during which time I frantically looked up what could be happening in there. I was concerned that because the tabs were aluminum and not silver... that something crazy could be going on. I could not find anything that suggested it should create a violent reaction so I got over it. The only thing I found was that the effect would not be as noticeable on aluminum as on silver. I rinsed them off and then took some fuchsia satin cord. (The reason that fuchsia is in bold italics is because I had to look up the spelling... because it is down right bizarre! Upon doing so, I learned that this color got its name from a genus of flowering plants... that obviously have bright pink/red/purple flowers. AND did you know that fuchsia is a synonym for magenta? Huhh... the things you can learn on the web!)
Back to the bracelet... Being completely honest, I did not use a tutorial for this because I found it pretty easy to figure out on my own. Buuut... since I am not doing tutorials yet... I searched and found the this was probably the best of the video tutorials on YouTube. Happy tabbing!

February 1, 2012: Cuffed

Last summer I made a cuff out of an old belt and wove chain through the belt holes. I got tons of compliments on it. Basically... the story is that I made another one today :). I have developed an obsession of sorts, with old leather belts. I literally stalk thrift stores for vintage leather belts... but generally will settle for any leather belt that has the slightest sign of being worn before. Haha. I really need to get to making more of these. Super simple - cut the belt to the size that you need (easily measurable by wrapping it around your wrist and overlapping it about 1in to account for the snap). Then, take a piece of chain (could be purchased at a craft store, jewelry supply store, or even just taken from an old piece of jewelry that you don't wear anymore) and weave the chain in and out of the holes. Once you get to the last hole, go back through the holes the opposite way (so there are no gaps between chain sections). When you get back to the beginning, secure the two ends of the chain with a jump ring (preferably the same metal/color as your chain). Side note: if you want to make more cuffs out of the same belt and need to make more holes, get a leather hole-punch tool or set
When you are done, you will need to set a snap fastener. You can buy snaps at a craft store like A.C. Moore or Michaels and the snap set usually comes with tools for setting. Some people would recommend using a more professional tool for better setting but if you are only beginning and do not know how much snap setting is in your future, I would recommend just going with the tools that come in the kit for now. This guy does a pretty good job demonstrating how to use set snaps this way. If you decide to go big-time, this lady will let you know how! :) Have fun!

January 31, 2012: Winging It

For this bracelet I used soldering techniques that I have described in past posts. The wing piece is sterling silver and the base is copper. Both pieces are from a box of someone's old jewelry-projects-went-wrong. I think my mom picked this box up at a rummage sale or something because it had metal findings :).
The truth is, I started this bracelet in December sometime but didn't finish it until today. Originally I had it on a piece of hemp cord and tied a knot to close it around my wrist. Well, that was not working out. I did not have the copper piece bent correctly so it was tipping forward and the wing was digging into my wrist... awesome - not to mention that it was a huge pain in the butt to put on and take off.
Which brings me to today :) I decided to use one of my new favorites, a magnetic clasp! They truly are the best clasps for bracelets because you do not have to awkwardly contort your wrist and fingers to close it... it just closes itself nicely. I folded a coper chain three times to make it a little bulkier and more secure. I actually really like it now. Yay!

January 30, 2012: Tear-able T!

When in doubt, rip up a T-shirt!

I was soooo tired on this Monday night but knew I had to do something. Luckily I have this awesome book on hand by Megan Nicolay about transforming T-shirts! Check out Generation T. Also, here is the first video that I saw on Threadbanger Channel onYouTube that caused me to buy her book:


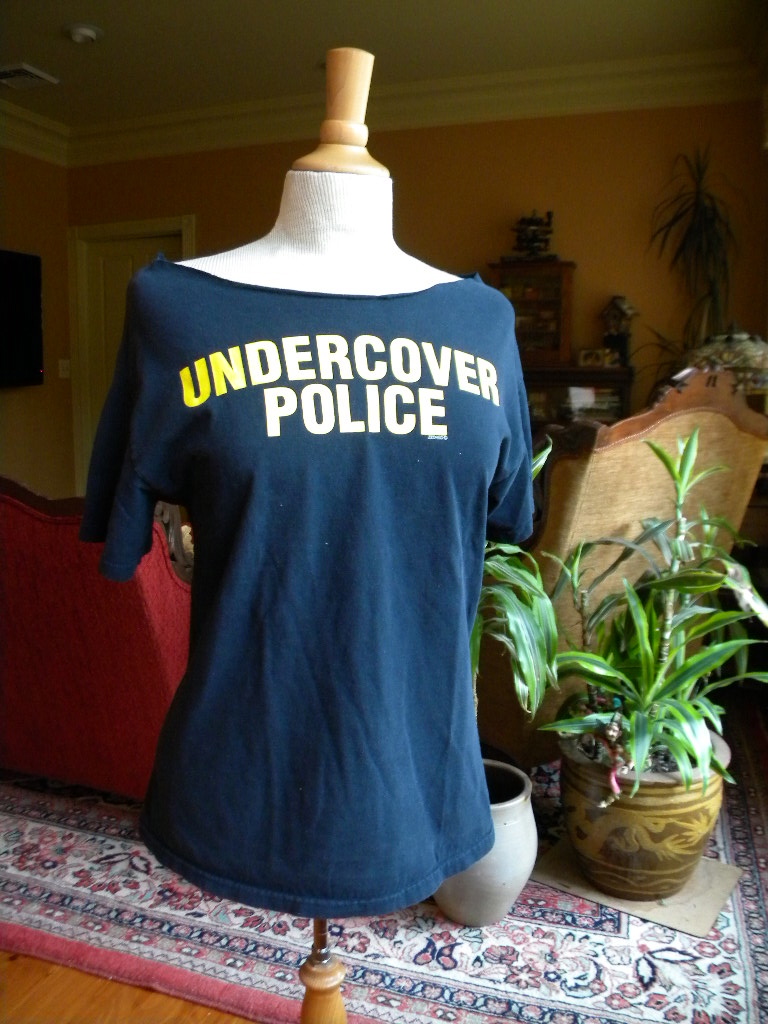
She's cool right? Check out her website for cool crafting ideas and to buy her books if you are interested. From her many ideas, I chose "Back in Action" for this Monday night project. I had a cool navy colored T-shrit that I got at a rummage sale somewhere along the line. I love the fact that it announces "Undercover Police" on the front... fabulous! Even though I find it incredibly cool, I have so many T-shirts that I never get around to wearing it. So I decided to make it into something... more than a T!

Here it is:

Basically I cut the collar out to create a wide neckline. Then I cut the back of the shirt into strips. Then I "laddered" the strips. Laddering is kinda hard to explain in writing... but here's a video that I found that can explain it... (PS... I think it is hysterical and awesome that many instructional videos on YouTube are actually done by... yup... high school-aged kids... again - we need education reform NOW... to have an educational system that actually recognizes and capitalizes on the world that these kids are living in - conclude rant...) Here's the link to the video.


January 29, 2012: Not LYEing, I made soap!

If you are planning to make soap, I would suggest some serious studying and planning... but minimal planning and haphazard trial and error is kinda fun too.

To begin, I went to an online soap calculator, gathered some materials from around the house, and made trip to the local Health Food Co-op.

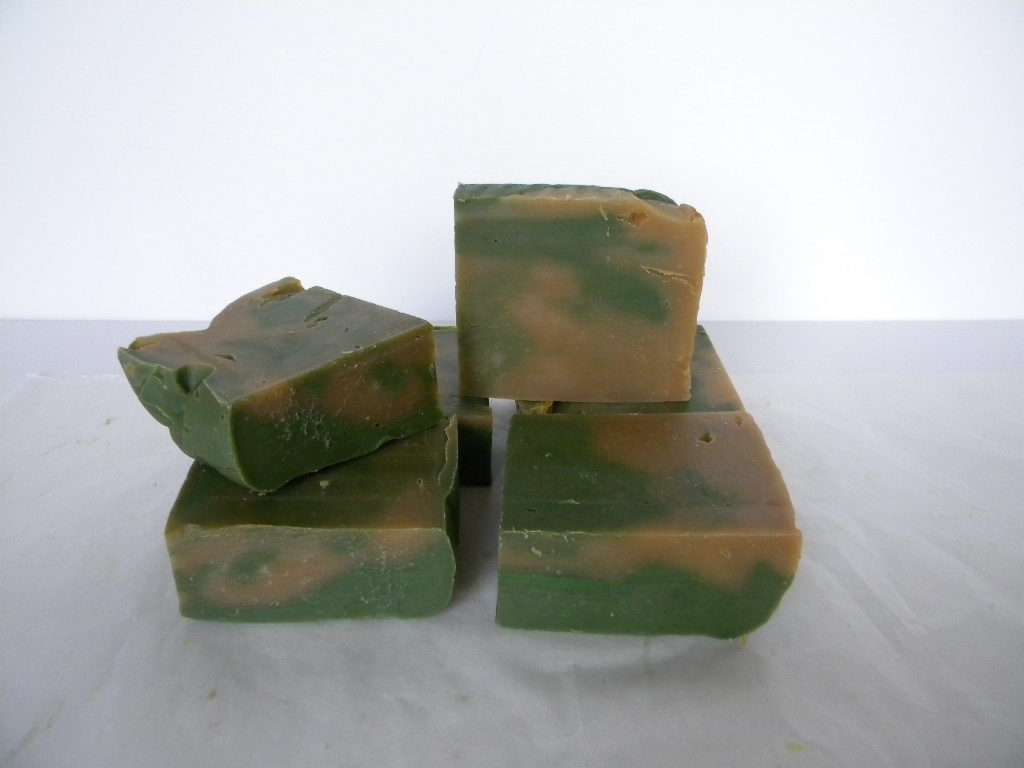
My first soap recipe contained beeswax, coconut oil, shea butter, sweet almond oil, sunflower oil, lye (sodium hydroxide), water, cedar wood essential oil, lavender essential oil and a green pigment. The video below explains how I made it (literally... I had this video on and paused it... played it... paused it... etc.)


The most interesting thing during this process was the extreme heat that the lye solution reached. I know, from teaching science, that a chemical reaction that gives off heat is referred to as "exothermic"- (exo meaning out and thermic meaning heat). So, it was clear that this was an exothermic reaction. However I was not sure why. It seemed to me that the ions Na+ and OH- should just separate from each other in the water and dissolve, creating the lye solution. Well, when I looked up WHY this would give off so much heat... I was surprised to find very little explanation (in layman's terms). I will translate (to the best of my ability).... The Na+ and OH- are clinging together in the solid sodium hydroxide in a certain crystalized shape. When put in water, a little bit of energy is needed to get the solvation process started. This was why it has to be stirred initially. When the ions start to break apart into the water, it is actually the part where the water molecules surround the individual Na+ and OH- ions that releases all of the energy. Hmmm. To visualize this, picture a piñata at a very large birthday party. The kids are like the water molecules and the candy inside the piñata is like the sodium and hydroxide ions. Everything remains relatively chill until the piñata breaks! Then all hell breaks loose and kids pounce on the candy and form clusters around candy piles... yelling, screaming, crying, fighting for candy. That is like the energy that is given off while water molecules surround the ions. Haha... after reading these silly elaborate explanations on all sciencey websites... that is what I get out of it. 
Regardless, it gets freakin' hot! So be careful :) and do not get any on your body!
My soap is still "curing" - as the soap lady says - but here it is :)


Sunday, January 22, 2012

January 21, 2012: The "gotta do" can be creative too!

This is a funny one :). You might imagine that creating/making/learning something everyday can be time consuming. As a result, my room and laundry and life, if you will... were getting a little out of control! So I had to clean up and organize. Saturday was a GYST day, as I like to call them (Get Your Shit Together). Since I had to do it, I decided to infuse my creative endeavor into the "gotta do." Earlier in the day I was on (my new faaaaaaavorite site...) Pintrest and I saw a creative use of fabric scraps that I loved.


I was inspired by this to make a scrappy bed skirt. This was the outcome :). Very rough and makeshift at this point, but I will follow up by sewing it together and making it into a finished product. Just remember, even the "gotta do" can be creative too!


January 19, 2012: The cutting edge


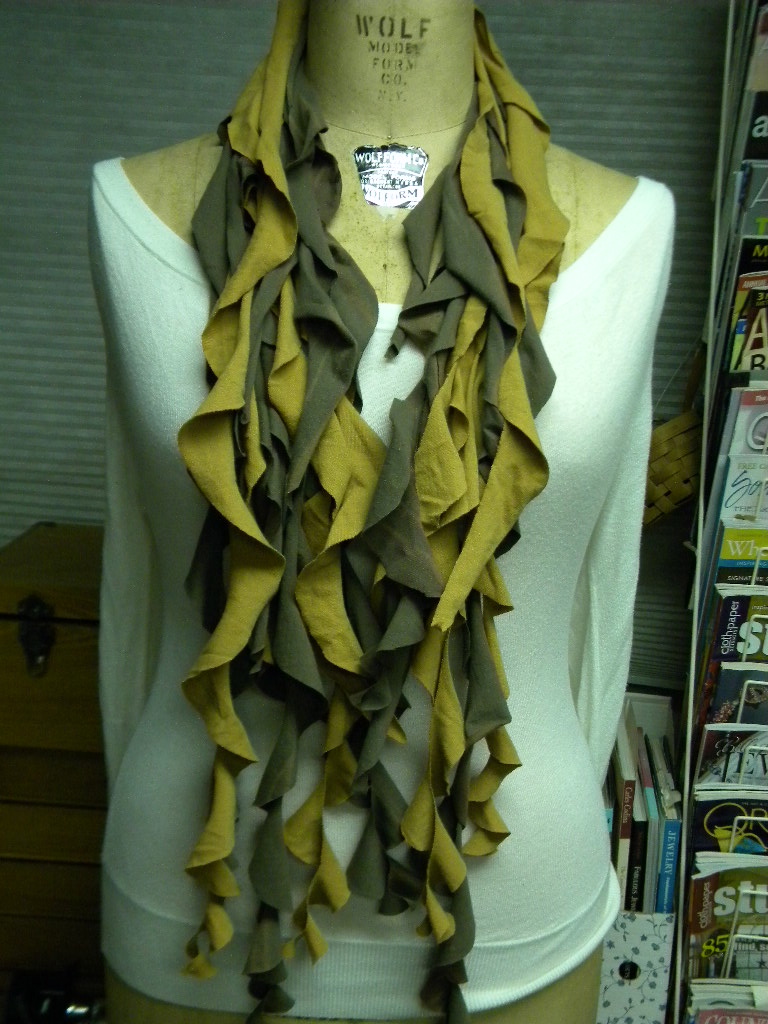
Yes! T-Shrits again! More to come too... ahhhahhhahhhaa. Many people are going crazy for this one. The good news is that it is easy breezy so you can whip this one up in a matter of minutes. All you need is:

  • 2 large T-shirts (a cool color combination)
  • Something circular (10-12in... or 25-30cm in diameter - a dinner plate would work)
  • A pencil to trace the circles
  • scissors
That is all! I'll do my best to explain...

  1. Start by spreading the T-shirts out on a table, front side down- smooth any wrinkles.
  2. Use the plate to trace 4 circles on the back of each shirt, if you can fit that many (try not to trace over a collar or hem... or major designs... if you don't want them to be part of your scarf)
  3. Cut each of the circles out (cut through both sides of the shirt, giving you 2 circles for each cut)
  4. If you did 4 cut-outs for each shirt you should end up with 16 total circles. 
  5. Pile the circles from the same shirt on top of each other (2 piles, one from each shirt)
  6. Cut the circle in a spiral - do this for each T-shirt pile of circles
  7. Separate the strands from each other and arrange them in a pleasing way. 
Just like the other T-shirt scarf, I will probably post my own tutorial video... but in the meantime... here is the site that I used to learn. Happy Re-Teeing!

January 18, 2012: Tearin' it up!

This is one of my favs! I always like doing different things with old T-shirts... and I guess that stems back to when my friends and I were in high school and we would go to thrift stores on a regular basis looking for the most beat-up and funky T-shirts we could find. As a result... I have a plethora of Ts. That, of course, does not stop me from buying more. Bag sales! Why not, when you can up-cycle to amazing accessories such as these?

How did I make it... hmmm. This one just might need a video or picture tutorial because it would be hard to explain in writing. I posted it to my Pintrest board for my creations and it is spreading like wildfire...So stay tuned, I will definitely follow up with a tutorial. Until then... just cut up those shirts and yank on the pieces, braid them and twist them until you have something fabulous!

January 15, 2012: Berry cinchy cowl :)

To be completely honest, I am not great at crocheting. As it turns out... I really do not like following patterns of any kind. Even in cooking, with recipes. I generally look at the basics of how to do something and then get creative with it. (FYI People do tend to like the things I cook... and no one has died, yet.)So, my crochet projects are generally cinchy - great word - and basic... but with a twist. I love the Threadbanger YouTube channel for learning cool DIY projects. This was the first crochet tutorial that I learned from. It is actually teaching how to make a slouch hat but you get the idea. With my limited crochet skills... I made some simple cowl scarves for my mom and sister this Christmas and they were a hit... and I wanted one for myself. When I made it, I thought it was a little to long; I wanted it tighter around my neck to keep me warmer. With that in mind, I incorporated a draw string in this one, where the strings come out of a little flower (which I have to get better at making). It slips over your head and then you can pull the strings to tighten it up for a warmer feel. Then, tie a little bow inside the flower. Cute and comfy.

Monday, January 16, 2012

January 14, 2012: It's a Wrap!

Today I revisited an old project that just did not end up quite right. To make this wrap bracelet originally, I took apart an old, black, braided leather belt. I took one of the strips of leather and hammered it and stretched it until it straightened out a bit. Once it looked straight and had the "worn" look that I was going for, I painted over the strip with turquoise acrylic paint. Once the paint dried I took either side of the strand in my hands and stepped my foot on the middle of the strand with the painted part hitting the bottom of my shoe. Then I moved the strand side to side, scraping it on the bottom of my shoe to make the paint peel and rub away. This gave it an old, beat-up look, which I love! When the strip of leather had the look I was going for it was time to figure out how to close the bracelet on my wrist. I punched holes in either end of the leather strip and added a rivet reinforcement. At the time, I added a silver chain and a crab-claw clasp. This was very difficult to close around my wrist. So, the bracelet sat around and I stared at it once in a while wondering how I could make it easier to close so I could wear it. Well, when I was in NYC recently I found some magnetic clasps. This was the answer to my dilemma! So now I am excited because my bracelet is much easier to take on and off :). I will probably be producing a bunch of these in the near future so stay tuned for an Etsy or Facebook link to purchase one if you are interested!

January 13, 2012: A Better Batch

I am branching into the DIY bath and body world and it is very exciting. There is much to learn about natural ingredients and various methods used to create the products. Today I learned all about making soap and I ordered the ingredients... so stay tuned for soap! Ok, so back to lip balm. I used the same procedure as the last batch but made some slight modifications to the ingredients. This batch includes beeswax, olive oil, sweet almond oil, shea butter, sunflower oil and peppermint oil. I also got this container at Michael's in the bead section. For a little bit o' shimmer and color I added something that is used in fondant and icing coloring. I got it at A.C. Moore in the cake decorating section. It was in a little vile and called "luster dust." I thought this would be a good addition for color because it obviously would not be harmful if it got in your mouth. I am waiting for the lip balm containers that I ordered and I still am not completely satisfied with the final product so... more to come!

January 12, 2012: It's a bird, It's a plane... It's an i-cord!


Disclaimer! PLEASE excuse these pictures! The attempt at zero expression, as ridiculous as it is, will hopefully allow you to focus on the piece and not my silly face. (Those of you who know me know I cannot take serious pictures...)
Now, I love this thing! It is a simple crocheted i-cord (similar to the very first creation on January 1st but shorter and with a lighter yarn size. (Here is a link that explains yarn measurements and descriptions, as it can get very confusing!... I have much to learn.) The coolest thing about this creation is that I do not really know what it is. It's a necklace... or a headband... or a choker-scarf-thing. Anyway, it fits nicely into my style and I think it could be worn across seasons so I just love it, alright!? :)

January 11, 2012: None of your Beeswax!

Today I made my own lip balm! Honestly, I am not even sure where I came up with the idea to it. Sometimes I am just thinking, "Gee... I wonder if I could make my own ____ (blank)." Then, I hit the computer and see where to start. So I guess that is how this project took root. The first tutorial that I watched, and most helpful, was by DIY Bath Body and Home on YouTube . There are soooo many tutorials out there though. If you are not interested in making a natural lip balm, you can mix Vaseline or Aquaphor with old eye-shadows or other coloring, which is very simple.
I did want to make a natural lip balm so I gathered some ingredients. Believe it or not, I had all of the ingredients for my first batch at home, but you can get any of this at A.C. Moore and your local grocery store. I used .5 ounces of beeswax, 1/2 cup of extra virgin olive oil, 1 tablespoon of honey, peppermint and orange essential oils. As shown in most videos, I used a double boiler to melt the beeswax. Then I added the olive oil, honey, and essential oils. This made enough to fill 12 tiny containers as shown in the picture. The entire process took about 1/2 hour! (I found these containers at A.C. Moore in the painting section) I gave the samples out from this first batch. I really cannot wait to get more creative with making bath and body products! I have since purchased several essential oils and shea butter from a local health food store and some other ingredients on Brambleberry.com. Stay tuned!

January 8, 2012: Tired to Tie Dye

One of my favorite creative pastimes is making t-shirt scarves. They are ridiculously simple and always result in a fun, versatile accessory! So, on this Sunday evening, post blog-updating and school-week-prep, I found myself incredibly exhausted... yet committed to continuing my daily creations. I had just purchased two old tie dye T-shirts from the Salvation Army so I decided to whip up a scarf. To make this scarf/necklace, start by cutting the T-shirt straight across from armpit to armpit. Next, cut off the bottom hem of the shirt. This should leave you with a rectangular piece of T-shirt. The piece should be in one connected loop. Cut strips (about 1 inch wide) from side to side. When you have all of your strips, pick them up individually and pull them so that the T-shirt material curls up and forms a noodle-like shape. Each strip should now be curled up. Put them together and you have your noodle scarf! Many more variations to come! Check out this great tutorial I found! : http://madethislovethis.com/made/tshirtscarf/

Tuesday, January 3, 2012

January 2, 2012: Leather Cuff


I have always admired cool leather cuff bracelets. After scouting Etsy and some funky street markets in NYC I started buying used leather belts at thrift stores and rummage sales. Now I have a beastly collection! This past summer I played around with making a couple of cuffs. My father works with tons of leather for work and also has a snap fastener and hole punchers, etc. Naturally, having tools available made my dreams of creating leather cuffs more realistic. So the crafting began :). However, I had seen all types of bracelets that had different types of fabric, metal, other leather pieces, etc. attached to the leather cuff with metal fasteners. Well, this 2012 endevor inspired me to see what I could do. I learned the difference between rivets, grommets and eyelets. Not an easy task! Rivets are solid on top and are used to fasten two pieces of fabric together. Grommets (larger) and eyelets (smaller) have holes in them, creating a reinforced hole in the fabric. Anyway... I found rivets at A.C. Moore and used them to stick two pieces of leather (from repurposed leather belts) together. I stamped the word "live." in the top piece. Check it out!

January 1, 2012: I-Cord Necklace... or is it a scarf??


This is my first creation of 2012. I saw it on Etsy and wanted to learn how to make one. So, naturally (as most people would do) I Googled it! Specifically I searched "crochet cord." This led me to a YouTube tutorial on how to crochet an i-cord. I grabbed a giant crochet hook, turned on the miserable Jets game :( and crocheted away. By the time the Giants were running away with Dallas, I was done! Check it out!