I was inspired by this to make a scrappy bed skirt. This was the outcome :). Very rough and makeshift at this point, but I will follow up by sewing it together and making it into a finished product. Just remember, even the "gotta do" can be creative too!
What do you do Period Ten? Period Ten is where learning is personal and you have the freedom and time to explore new ideas and pursue mastery in a skill or content area. This idea was born out of my passion for education and my belief in the importance of relevant and meaningful learning and creating. During "Period Ten," everyday in 2012, I am going to create and/or learn something new. Each week I will share my progress. To learn more, please visit the Period Ten page link. Enjoy!
Sunday, January 22, 2012
January 21, 2012: The "gotta do" can be creative too!
I was inspired by this to make a scrappy bed skirt. This was the outcome :). Very rough and makeshift at this point, but I will follow up by sewing it together and making it into a finished product. Just remember, even the "gotta do" can be creative too!
January 20, 2012: Possible... what a word!
"Be kind whenever possible. It is always possible." - Dalai Lama
To make this ring I used many of the techniques I have explained in past posts (check-em!) The ring itself is made of nickel-silver and I hammered and bent it using a ring mandrel and soldered it closed. Then I soldered an old watch setting to the ring. Next I painted the inside of the setting with ModPodge to seal off any cracks or crevices. Next, I put in the word "possible" that I cut out of an old dictionary. I think this might be my favorite word in the English language. If you take a second to consider it's meaning... it is inspiring. Really.. it applies to anyone's life... and anything you want to do. Most things are possible if making it happen is a priority to you. :)
Well, once my favorite word was adequately ModPodged into this watch setting, I covered it with resin.... several coatings. The reality is that I did this over the course of several days and only finished it on Friday 1/20/12. So here it is :) Enjoy the possibilities friends!
January 19, 2012: The cutting edge
Yes! T-Shrits again! More to come too... ahhhahhhahhhaa. Many people are going crazy for this one. The good news is that it is easy breezy so you can whip this one up in a matter of minutes. All you need is:
- 2 large T-shirts (a cool color combination)
- Something circular (10-12in... or 25-30cm in diameter - a dinner plate would work)
- A pencil to trace the circles
- scissors
- Start by spreading the T-shirts out on a table, front side down- smooth any wrinkles.
- Use the plate to trace 4 circles on the back of each shirt, if you can fit that many (try not to trace over a collar or hem... or major designs... if you don't want them to be part of your scarf)
- Cut each of the circles out (cut through both sides of the shirt, giving you 2 circles for each cut)
- If you did 4 cut-outs for each shirt you should end up with 16 total circles.
- Pile the circles from the same shirt on top of each other (2 piles, one from each shirt)
- Cut the circle in a spiral - do this for each T-shirt pile of circles
- Separate the strands from each other and arrange them in a pleasing way.
January 18, 2012: Tearin' it up!


How did I make it... hmmm. This one just might need a video or picture tutorial because it would be hard to explain in writing. I posted it to my Pintrest board for my creations and it is spreading like wildfire...So stay tuned, I will definitely follow up with a tutorial. Until then... just cut up those shirts and yank on the pieces, braid them and twist them until you have something fabulous!
January 17, 2012: Magnetizing
More bottle caps and resin. This time it is the real resin. The difference between this and the epoxy I have used in the past is astounding. It is so much clearer and dries much harder and smoother. Very exciting! I want to experiment with putting different things in resin. What I have realized is that I really need to make sure that any paper (magazine, book, etc.) that I put in resin is adequately covered in Mod Podge first... and dry. This will seal it from getting a wet look when I apply the resin. So, I did not get exactly what I was looking for here... but it's all about learning right!?
The first one I did is the one that has the dictionary words cut out: "seize, autonomy, friend." I love this pieced-together phrase because it is basically saying... "Dear Friend, go out and get yourself a life that you are in control of!" -Love Me Hahaha.

The second one I made is the "colorful abyss." I just picked out two words that described what the magnet itself looked like. There are colorful seed beads piled up inside the bottle cap and then secured with resin. For this one I did the beads first and when it was dried I put the words on top and added more resin. Two others have some seed beads poured into the bottle cap and resin over top... that's it! Each of the caps have magnets attached to the back.
The first one I did is the one that has the dictionary words cut out: "seize, autonomy, friend." I love this pieced-together phrase because it is basically saying... "Dear Friend, go out and get yourself a life that you are in control of!" -Love Me Hahaha.
The second one I made is the "colorful abyss." I just picked out two words that described what the magnet itself looked like. There are colorful seed beads piled up inside the bottle cap and then secured with resin. For this one I did the beads first and when it was dried I put the words on top and added more resin. Two others have some seed beads poured into the bottle cap and resin over top... that's it! Each of the caps have magnets attached to the back.
January 16, 2012: A spoonful of time
I started this pendant by hammering an old spoon until it was flat. Then I filed, sanded and buffed it until it had the desired look and feel. Next I placed the watch piece on the surface of to see where I wanted to solder it on. I marked where it was going to go and then punched the word "flies" into the metal using a metal punch set that was picked up at a rummage sale. I tried a new technique, sweat soldering, to attach the watch piece to the spoon piece. It worked! Although, I imagine I will try something else in the future because the watch insides do not seem too fond of the heat... smokey... yikes! Perhaps some sort of cold connection? We'll see.
Then it was time to buff it up to the desired look. Again, as usual, I like the worn and beat up look so I did not shine it up too much. Once it had the look, I put a hole in the pendant so that I could connect the jump ring and put it on a chain. To make this hole I used a metal hole punch screw. Before attaching it to a chain I wanted to make the letters stand out more. To accomplish this, I had to oxidize the metal using an oxidizing agent. Oxidation (zing! science is everywhere!) happens as a result of a redox reaction (reduction/oxidation) where one substance is reduced (picks up electrons) and the other is oxidized (loses electrons). In this case, the metal is oxidized using a using liver of sulfur . This made the letters darker and less shiny, causing them to stand out and be easier to read. To finish up, I put a jump ring through the hole and then put it on a silver chain that I had from years ago.
I tried to put links to everything that I used so you can find what you need easier if you want to make something like this. Have fun!
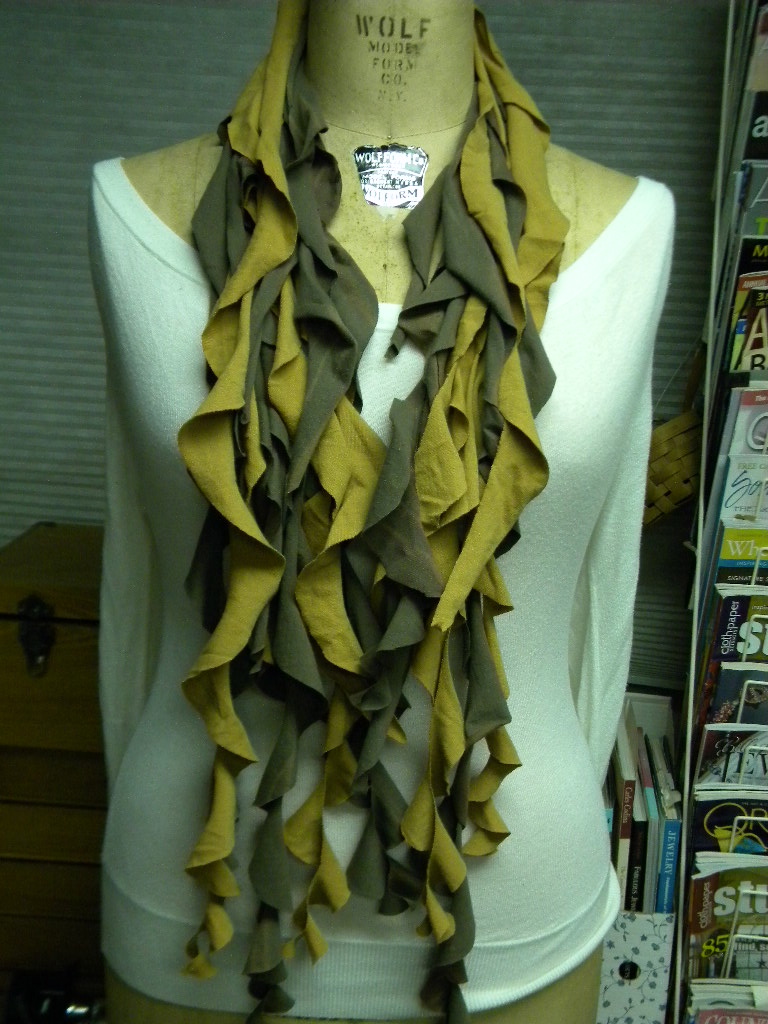
January 15, 2012: Berry cinchy cowl :)
To be completely honest, I am not great at crocheting. As it turns out... I really do not like following patterns of any kind. Even in cooking, with recipes. I generally look at the basics of how to do something and then get creative with it. (FYI People do tend to like the things I cook... and no one has died, yet.)So, my crochet projects are generally cinchy - great word - and basic... but with a twist. I love the Threadbanger YouTube channel for learning cool DIY projects. This was the first crochet tutorial that I learned from. It is actually teaching how to make a slouch hat but you get the idea. With my limited crochet skills... I made some simple cowl scarves for my mom and sister this Christmas and they were a hit... and I wanted one for myself. When I made it, I thought it was a little to long; I wanted it tighter around my neck to keep me warmer. With that in mind, I incorporated a draw string in this one, where the strings come out of a little flower (which I have to get better at making). It slips over your head and then you can pull the strings to tighten it up for a warmer feel. Then, tie a little bow inside the flower. Cute and comfy.
Subscribe to:
Posts (Atom)