Sunday, February 26, 2012

February 12, 2012: Get off MY Soapbox!


Haha! As I was thinking of a title for this post (which is about a very literal soap box)... I questioned "where did the saying 'get off your soapbox' come from?" Well my friends, since I find myself on my own "soapbox" more than I would like to admit... I feel obligated to share the origin of this saying. To avoid plagiarizing Wikipedia just check out the page on the soapbox.
So, people would literally elevate themselves on a box used for shipping soap... huh. My favorite part is that the modern form of a soapbox is a blog. Hmmm...
Well, I built a soap box! Earlier posts explained how I learned to make soap and showed off my first batch. However, during that process I had to use a tupperware container for my soap mold... that was less than ideal. I decided to make my own soap mold that had the dimensions I was looking for as well as clean edges.
To make this box I used some fun power tools...(Thanks Dad!). The box is made out of cherry- check out info about this and other types of wood. To cut the pieces, I used a chop saw (check it out below!). The very thin piece of wood that covers the bottom of the box was cut using a band saw. I put the pieces together using a nail gun. 
Bad A$$ :)


February 11, 2012: What's Cookin' at Peters Valley?

If I could choose to teach something other than biology it would be.... ART :) (actually it would be cool to teach an alternative Phys Ed class... like kickboxing, Jiu Jitsu or Yoga or something too). Anyway, my secret desire to teach, well... everything... leads me to wonder around the building incessantly looking for cool stuff that's going on (and trust me there is quite a bit when you look for it!). Point is, during one of my escapades, I became aware that the ceramics teachers and students go to Peters Valley Craft Center twice a year. This is very exciting news because I basically grew up at Peters Valley, because my mom was the director there for many years. I have always wanted to visit the RHS group while they were there but for whatever reason... I had not gotten the chance... until today! 
The RHS group had worked for months making pieces to fire in the wood fire kiln at PV. The process of firing the kiln is very labor intensive. But, I will say that the RHS team was so good that they were actually finished by the time I got there! They had been stoking the kiln around the clock, taking shifts during the day and over night to get the kiln to a certain temperature and then maintain that temperature. The temperature of the firing is crucial to the success of the firing. As I am writing this I am trying to look for more information to share with you about the actual process. While I thought I learned quite a bit... I am realizing that it is not enough. (I am going to talk to the ceramics teacher and the students to gather some more information and then edit... so stay tuned!)
But I would like to share that the ceramics teacher and I did bounce around some cross-curricular ideas such as:
Science: 1) the firing temperature and the reaction of glazes, etc 2) the clay itself - origin/composition/ geology/mineralogy/etc
Social Studies: 1) the history of wood fire (Asian roots of wood fire ceramics), 2) historical significance of clay 3) the history of Peter's Valley and the Tock's Island Dam Project - eminent domain, etc. 
The list is still growing but there is quite a bit of potential here!
Peters Valley is also home to an Anagama kiln, which is a Japanese word meaning "cave kiln." The Anagama is a long kiln that is built into the side of a hill at PV. It is fired once or twice a year and is a huge production. I remember being little and throwing a piece on the kick-wheel just to put in the Anagama. Then, when it was time to load the kiln I would get to walk in the kiln and up the steps to put my piece inside. It was exciting. The placement of the pieces in the Anagama effects how the piece will look after being fired. This is because the flame will take different paths depending on the placement of the pieces. The fire is stoked at the bottom of the kiln and there is a flue at the other end, causing the flames and smoke to take a path upward through the kiln, passing over the pieces of pottery. This causes an unpredictable pattern and sometimes color to appear on the pieces... which is why it is so exciting to take the pieces out after it cools down! The Anagama is stoked 24 hours a day for several days before firing is finished. Everyone anxiously awaits the opening. 
What the RHS group did is similar to the firing of the Anagama but I would love to get more detail from them about their process and maybe share some pictures of their work. Meanwhile... perhaps I will share this picture of me on a swing when I visited the RHS group at PV.

Tuesday, February 21, 2012

February 10, 2012: Round and round we go!

Simple? Yes. I saw a similar necklace on Pintrest one day and I immediately added it to my list of things to make. Luckily I had this old chain that I got at Metalliferous for $2.00 a couple of years ago. The chain has several different sized rings and they are made of some strange flimsy metal... perfect for this project. I used wire cutters to cut 4 different-sized rings off of the chain, then I secured them to the chain with a jump ring. The rings are light and they fit together nicely in the jump ring. I wish I had more to say about this one :)... It is a very easy project if you have some old jewelry findings lying around.

February 9, 2012: Jammin'... well not quite

Last year I had the wonderful idea to learn how to play the guitar. I still REALLY want to learn but I realize that it will take some serious work and dedication... and that means time... which is hard to come by. I asked a very talented young lady, a student, to teach me how to play. She was enthusiastic about it and we got started... we were able to get a couple of lessons in after school but then both of our schedules seemed impossible. Regardless, I truly do thank her for her time and willingness to attempt to help me. I think we will resume again... we shall see...
I made her this bracelet. When I hear the word "jammin'" I think of musicians... so I thought it was a cool word to punch on her bracelet. Check it out :)

This bracelet is made from an old belt (the buckle is still on it - that's what closes the bracelet). Then I punched the word into a pieces of sterling silver. To help the letters stand out more, I used the liver of sulfur again to oxidize the metal. Then I buffed the surface of the metal and the letters stayed oxidized (to learn more about the oxidation and liver of sulfur, click the label's below to jump to previous posts). I used rivets to attach the silver to the leather.

February 8, 2012: It's a bird... It's a plane... Its JERSEY!

(First, let me apologize... I am falling a bit behind with updating you on my creations! Gasp! - Life... what can ya do?) 
I have always been interested in new ways to recycle old magazine pages. They are so colorful and fun but the darn things pile up and up and up! While browsing DIY stuff on YouTube, I came across this neat idea for a recycled magazine necklace. 

I didn't really have a ton of time so I just played around with the idea, rolling and gluing, rolling and gluing. I wrapped some paper around the abstract shape that I came up with and poured some of the resin over it.
When it dried I picked it up and saw... JERSEY!? I did not even mean to make it :)

With Flash

I decided it would make a wonderful key chain so I drilled a hole in the resin. Then I strung a piece of wax linen cord through the hole and attached a key ring. Ta-da! Recycled magazine Jersey key chain!

Monday, February 13, 2012

February 7, 2012: R-R-R-Rams!

Last November, I had the chance to take part in the International Center for Leadership in Education's (ICLE) Leadership Academy in Dallas TX with some of the most awesome educators that I have met. The entire experience was so positive and left me energized and motivated to continue to pursue my passion - Education Reform. Locally, nationally and globally, education needs to better serve our students and their respective communities. ICLE seems to really understand that, and they are doing something about it. Our district sent 8 people to The Leadership Academy. Each school in our district was represented. The funny thing that we later reflected on was that although we were sent by the same district, we might as well have come from different states... we did not even know what faces to look for, many of us had never met. We soon realized that we were not isolated individuals but pieces to a puzzle... that belonged together. We spent the next 2 1/2 days sharing stories of our district, assessing our current status and making plans for the future.
ICLE focuses on three main facets of quality education; Relationships, Relevance and Rigor. (Although, I should be honest and admit that they say them in the order of rigor, relevance and relationships... we believe the order should be switched). Our three days as a district team revealed that positive relationships is absolutely where we must start our growth from who we are to who we want to be. We used our own experience as a group as rationale for the need to focus on establishing relationships within our district.
Since returning from Dallas, we have established a similar group of teachers at the high school to focus on RRR specifically at the high school. This group ALSO, came to the same conclusion, that Relationships truly is our first R. With positive relationships among staff, students, parents, schools and community... everything else becomes possible!
(I should mention that I could literally write about this topic continuously to my 67th birthday... but I'll stop here for now.) I made this out of an Altoids can with the Rs in mind :)
As you can see (actually, maybe you can't - not the best picture) I stamped the words "First thing is first" in the metal lid on the left. On the right side you can see a sort-of R-pyramid, made out of old blocks and game pieces I had - oh - just lying around. (cough cough - my mother hoards game pieces!). The idea is that relevance and rigor, while enormously important to quality education, must be built on a foundation of positive relationships.

OK - wait - hold up! I just looked up the word rigor... and honestly... I'm not sure I like that word anywhere near education... check out the definition. I have been singing songs of RRR and have been thinking all the while that rigor was about stretching people to achieve great things... UMMM!??... I am soliciting your opinion on a replacement R word? Thoughts? It should mean "stretching to be better than you are" or "intense engagement" maybe "extremely high but reachable expectations"...something along those lines. I really do not like the fact that the definition of the word rigor kind of is the opposite of positive relationship? Maybe I am just not comprehending the connotation? More to come at at later date...

February 6, 2012: A-CORDing to Me!

Neck-wear, neck-wear... all about it. My very first creation of this year, and first post on Period Ten is a crochet cord scarf. Well, now I have several of them because I love them so much and always get fantastic compliments. They can be wrapped around to form a bunchy, warm wrap for your neck or they can be worn loosely, acting more like a necklace. I wanted to make some that had a different stitch. So I looked up other ways to make a crochet cord. I found one that was exactly what I was looking for. It would create a lighter (thinner) cord and looked decorative - and looked harder than it actually is - always a plus!

This is the first one I made. It took me about an hour - one episode of House on Fox :)


 Since that only took an hour... I figured, why not bang out another while watching American Idol - wait no... it was Hoarders!

And then I got a little crazy with some RHS Rams themed ones... who will be the lucky recipients?

 How did I learn how to make this cord you ask... well...


Yes this is in some other language... (pause for serious Internet search...) It's Russian!! Haha. Figured it out. Ok, so I am adding YouTube tutorials to my list of things to "make." Stay tuned!

Sunday, February 12, 2012

February 5, 2012: Super Bowl OF CHILI!

Ahhh Happy Super Bowl! I thought it would be appropriate if I made a Giants scarf for my Super Bowl fiesta that I was attending. I ended up leaving it with my dear friend, the hostess, after the exhilarating victory (which is fine because I am actually a Jets fan... but happy to see Giants win tonight) Check it out:


My true creation of the day however was a monster pot of chili! You may not know that I love to cook. Cooking is, after all, an art (one of my students said that the other day and she is super smart, funny and creative so I know this is true!). Today my creation was my own chili recipe! I cooked up a huge pot for a Super Bowl party. Disclaimer: This is Paula Dean-on-steroids chili... not for the clean eater. If you are aiming to please with taste, this is the way to go. Yum. Second disclaimer: I do not usually follow recipes... actually I really never follow recipes... hmmm. Furthermore, I am not sure exactly how much I used of each ingredient... but it worked! Have fun and experiment... that's what its all about.

Sorry, I forgot to take a pic before the partaaay...
You get leftovers! :)
Ingredients:

  • applewood smoked bacon chopped
  • italian sausage
  • ground beef
  • chick peas
  • yellow onion chopped
  • green pepper chopped
  • red pepper chopped
  • yellow pepper chopped
  • minced garlic
  • tomato paste
  • fresh salsa
  • mild salsa (Tostitos)
  • Tobasco sauce 
  • chili powder
  • salt 
  • pepper

Instructions:

  1. First, chop up the bacon and put it in a large frying pan on medium heat.
  2. When the bacon is pretty crispy and there are lots of tasty fats in the bottom of the pan, put in your chopped onion, peppers and minced garlic. 
  3. Cook on medium heat until the onions and peppers are caramelized.
  4. Mix the fresh salsa into the onion, pepper, bacon mixture and let sit on low heat.
  5. In a large pot, add the Italian sausage and ground beef. Cook on medium heat until the meat is cooked through. Mix periodically while cooking.
  6. When the meat is cooked, add the onion, pepper, bacon mixture from the pan to the meat and mix thoroughly.
  7. Add the tomato paste, medium salsa, tobacco sauce and salt and pepper and mix.
  8. Add the chick peas and mix.
  9. Let simmer on medium-low heat until ready to serve.
  10. Optional: You can add some chili flavoring if you want a stronger flavor. 
I know it seems a little scary, my approach to cooking, but it always works out in the end and tastes amazing! Now I just have to actually make notations about what (and how much) is going into the dish. OK fine!

Saturday, February 11, 2012

February 4, 2012:

As I may have mentioned, my dad does some amazing upholstery and woodworking for various things such as classic cars, private jets, antique furniture, custom furniture, etc. - you name it. He is truly one of the most talented people that I have ever met. This past summer, two of the cars that he did the interiors for were first in their class at Pebble Beach Concours d'Elegance - the most prestigious classic car competition in the world! The one car, the 1934 Voisin, won Best In Show! Jay Leno was certainly impressed - Check out this video.
Anyway, the reason I am telling you all of this is that my dad's shop has been a wonderful place to gather materials for my projects over the years :). Among my favorite things to get from his shop are leather sample books! Leather companies send little sample books with various colors of leather. The pieces are small and have so much potential! In this project I cut two strips from different samples out of the book. I braided the two strips together with a piece of chain and connected the ends to some metal rings that I got at Beads World in NYC. At first I thought I was going to make this into a bracelet but suddenly I was struck with the idea of making this asymmetrical necklace, which I am really happy with! I had to make sure that I had heavier chain on the bottom so that the braided part would hang to the side. I attached a lighter weight chain to the top, which will prevent that from moving toward the bottom and shifting the location of the braided part. I used jump rings to connect the chain parts. I used fabric glue to fold the leather parts over and connect them to the metal rings. I think I will get quite a bit of wear out of this one :).

February 3, 2012: Finally Got My Black Belt!

You may or may not know that one of my passions is MMA. Yeahhh... so I have not been training lately... which really bothers me :(. The reason I am not training boils down to 50% living so darn far away from where I train, 25% is the fact that I am obsessed with Period Ten, 15% is lack of TIME and 10% is the need to just get over the other 90% and just DO IT AGAIN ALREADY! (end rant...) So, I jokingly titled this post "Finally got my black belt." Hmmm... NOT. But, I did make a cuff out of an old black leather belt!? Check it out:


I cut the strips with a razor blade, keeping the belt in one piece at either end. I set the snaps fastener (technique in earlier post) on either end and viola! I have seen ones like this on Etsy many times before and always wanted one. What better way to get one than to DIY!!!?

February 2, 2012: Keepin' Tabs


This one is cool because I picked it up from kids at school. I think the National Art Honors Society has been making them and selling them for fundraising. (Not sure about that one... but I did hear that from a student and I have seen these around on multiple occasions - in and out of school.) I was having a difficult time thinking of something to make today and realized that I had wanted to try this. I had a coffee can full of tabs so that was that. I do, however, have a knack for making things slightly more difficult than they need to be... and here's how I did it this time. I was not fond of the shiny silver look of the tabs so I decided I would try to oxidize them a little using liver of sulfur (technique discussed in January 16 creation). Well... I put about 30 tabs into a small amount of the oxidizing agent and it got interesting. It started making this metallic looking solution and started bubbling! I thought I was going to blow something up. Ugh. I let them sit in there a while, during which time I frantically looked up what could be happening in there. I was concerned that because the tabs were aluminum and not silver... that something crazy could be going on. I could not find anything that suggested it should create a violent reaction so I got over it. The only thing I found was that the effect would not be as noticeable on aluminum as on silver. I rinsed them off and then took some fuchsia satin cord. (The reason that fuchsia is in bold italics is because I had to look up the spelling... because it is down right bizarre! Upon doing so, I learned that this color got its name from a genus of flowering plants... that obviously have bright pink/red/purple flowers. AND did you know that fuchsia is a synonym for magenta? Huhh... the things you can learn on the web!)
Back to the bracelet... Being completely honest, I did not use a tutorial for this because I found it pretty easy to figure out on my own. Buuut... since I am not doing tutorials yet... I searched and found the this was probably the best of the video tutorials on YouTube. Happy tabbing!

February 1, 2012: Cuffed

Last summer I made a cuff out of an old belt and wove chain through the belt holes. I got tons of compliments on it. Basically... the story is that I made another one today :). I have developed an obsession of sorts, with old leather belts. I literally stalk thrift stores for vintage leather belts... but generally will settle for any leather belt that has the slightest sign of being worn before. Haha. I really need to get to making more of these. Super simple - cut the belt to the size that you need (easily measurable by wrapping it around your wrist and overlapping it about 1in to account for the snap). Then, take a piece of chain (could be purchased at a craft store, jewelry supply store, or even just taken from an old piece of jewelry that you don't wear anymore) and weave the chain in and out of the holes. Once you get to the last hole, go back through the holes the opposite way (so there are no gaps between chain sections). When you get back to the beginning, secure the two ends of the chain with a jump ring (preferably the same metal/color as your chain). Side note: if you want to make more cuffs out of the same belt and need to make more holes, get a leather hole-punch tool or set
When you are done, you will need to set a snap fastener. You can buy snaps at a craft store like A.C. Moore or Michaels and the snap set usually comes with tools for setting. Some people would recommend using a more professional tool for better setting but if you are only beginning and do not know how much snap setting is in your future, I would recommend just going with the tools that come in the kit for now. This guy does a pretty good job demonstrating how to use set snaps this way. If you decide to go big-time, this lady will let you know how! :) Have fun!

January 31, 2012: Winging It

For this bracelet I used soldering techniques that I have described in past posts. The wing piece is sterling silver and the base is copper. Both pieces are from a box of someone's old jewelry-projects-went-wrong. I think my mom picked this box up at a rummage sale or something because it had metal findings :).
The truth is, I started this bracelet in December sometime but didn't finish it until today. Originally I had it on a piece of hemp cord and tied a knot to close it around my wrist. Well, that was not working out. I did not have the copper piece bent correctly so it was tipping forward and the wing was digging into my wrist... awesome - not to mention that it was a huge pain in the butt to put on and take off.
Which brings me to today :) I decided to use one of my new favorites, a magnetic clasp! They truly are the best clasps for bracelets because you do not have to awkwardly contort your wrist and fingers to close it... it just closes itself nicely. I folded a coper chain three times to make it a little bulkier and more secure. I actually really like it now. Yay!

January 30, 2012: Tear-able T!

When in doubt, rip up a T-shirt!

I was soooo tired on this Monday night but knew I had to do something. Luckily I have this awesome book on hand by Megan Nicolay about transforming T-shirts! Check out Generation T. Also, here is the first video that I saw on Threadbanger Channel onYouTube that caused me to buy her book:


She's cool right? Check out her website for cool crafting ideas and to buy her books if you are interested. From her many ideas, I chose "Back in Action" for this Monday night project. I had a cool navy colored T-shrit that I got at a rummage sale somewhere along the line. I love the fact that it announces "Undercover Police" on the front... fabulous! Even though I find it incredibly cool, I have so many T-shirts that I never get around to wearing it. So I decided to make it into something... more than a T!

Here it is:

Basically I cut the collar out to create a wide neckline. Then I cut the back of the shirt into strips. Then I "laddered" the strips. Laddering is kinda hard to explain in writing... but here's a video that I found that can explain it... (PS... I think it is hysterical and awesome that many instructional videos on YouTube are actually done by... yup... high school-aged kids... again - we need education reform NOW... to have an educational system that actually recognizes and capitalizes on the world that these kids are living in - conclude rant...) Here's the link to the video.


January 29, 2012: Not LYEing, I made soap!

If you are planning to make soap, I would suggest some serious studying and planning... but minimal planning and haphazard trial and error is kinda fun too.

To begin, I went to an online soap calculator, gathered some materials from around the house, and made trip to the local Health Food Co-op.

My first soap recipe contained beeswax, coconut oil, shea butter, sweet almond oil, sunflower oil, lye (sodium hydroxide), water, cedar wood essential oil, lavender essential oil and a green pigment. The video below explains how I made it (literally... I had this video on and paused it... played it... paused it... etc.)


The most interesting thing during this process was the extreme heat that the lye solution reached. I know, from teaching science, that a chemical reaction that gives off heat is referred to as "exothermic"- (exo meaning out and thermic meaning heat). So, it was clear that this was an exothermic reaction. However I was not sure why. It seemed to me that the ions Na+ and OH- should just separate from each other in the water and dissolve, creating the lye solution. Well, when I looked up WHY this would give off so much heat... I was surprised to find very little explanation (in layman's terms). I will translate (to the best of my ability).... The Na+ and OH- are clinging together in the solid sodium hydroxide in a certain crystalized shape. When put in water, a little bit of energy is needed to get the solvation process started. This was why it has to be stirred initially. When the ions start to break apart into the water, it is actually the part where the water molecules surround the individual Na+ and OH- ions that releases all of the energy. Hmmm. To visualize this, picture a piñata at a very large birthday party. The kids are like the water molecules and the candy inside the piñata is like the sodium and hydroxide ions. Everything remains relatively chill until the piñata breaks! Then all hell breaks loose and kids pounce on the candy and form clusters around candy piles... yelling, screaming, crying, fighting for candy. That is like the energy that is given off while water molecules surround the ions. Haha... after reading these silly elaborate explanations on all sciencey websites... that is what I get out of it. 
Regardless, it gets freakin' hot! So be careful :) and do not get any on your body!
My soap is still "curing" - as the soap lady says - but here it is :)


Friday, February 10, 2012

January 28, 2012: All of the SUDSon

Soooo.....aaap. When I set out to learn how to make soap, I did not know the adventure I was in for! Let's just say that it is certainly put both my creative and science skills to the test.
As a biology teacher, I spend a good amount of my day (and year) discussing the chemistry of living things. Hmmm... sounds so interesting huh? Well I really do think it is fascinating. Even better now that I can apply it to making natural soap in my kitchen!

Ever notice that cleaning a greasy pan with just plain old water does not work to well? The problem is that water is polar (the molecules act like little magnets - with opposite charges at each end) which causes it to be attracted other things polar but repel things like oils and greases which are non-polar. This is why water and oil "don't mix." If you add some soap though... viola! You can clean your pan (or your greasy hair or body - gross)! Soap acts like a mediator, causing oil and water to "shake hands" and get along - mix. Why can soap do this, you ask? Soap has a polar end (which connects to the water) and a non-polar end (which connects to the grease) creating a link between the two. The process of making soap is fantastic! The website that I used (mostly) to learn is How2Soap. The video below explains the basic ingredients:


So, the ingredient, Lye, is 100% NaOH (sodium hydroxide), which is a very strong base and can cause severe burns. When a base, such as NaOH, combines with an acid, such as HCL (hydrochloric acid) it undergoes a neutralization reaction. (NaOH + HCl --> H2O + NaCl.... OR sodium hydroxide and hydrogen chloride will make water and salt! - aka.. not harmful!)

So, the oils that are used in soap-making, contain molecules called "fatty acids" which are non-polar, and, obviously, acids! So the reaction between the lye and the oils is a neutralization reaction that creates soap and water. During the "curing" process, the water evaporates. The remaining soap molecules contain the fatty acid end (non-polar end that will like the grease!) and the polar end (that likes the water!). The entire process of making soap this way is called "cold process." Viola!

The video below explains the basic chemistry of soap:


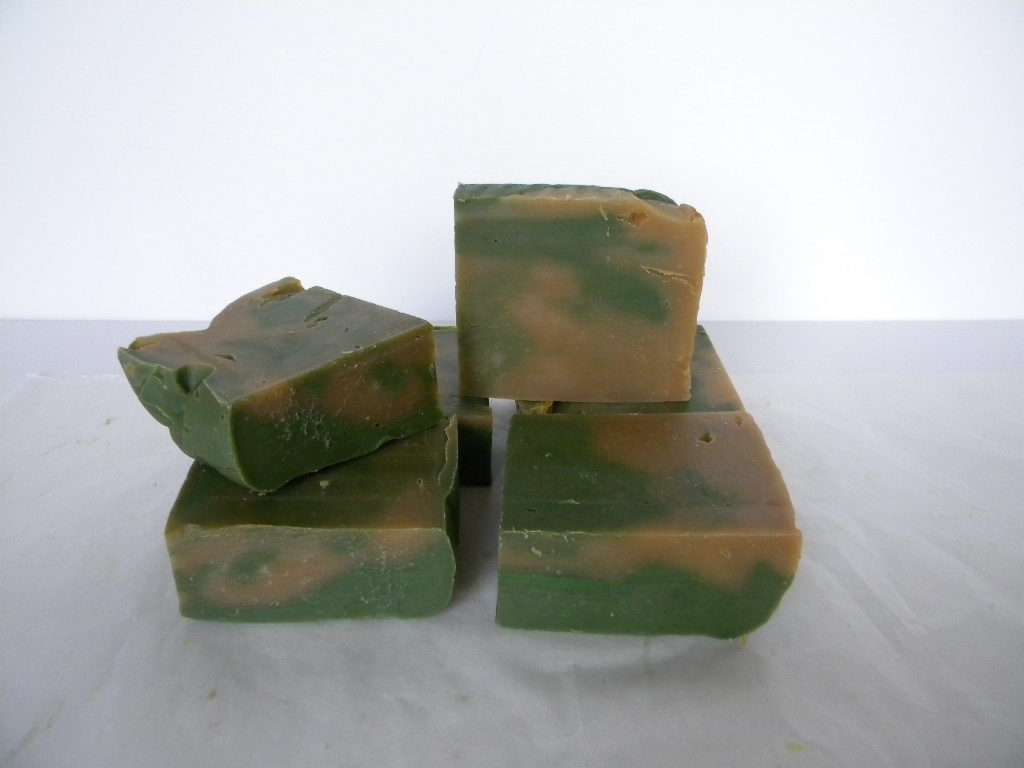
So my next step (next day)... is to make soap! Stay tuned!

Wednesday, February 8, 2012

January 27, 2012: Unlock Your Talent!

Diggin' this necklace. The cool thing is that it didn't take much time at all. (Good thing because Friday nights I do ski club with RHS and I don't get back until late...) Soooo... as you can see... it is a simple silver chain with a set of keys, a heart shaped lock (from an old diary or something), a green glass bead and a cut-out piece of aluminum with the word "talent" stamped in it. I liked the combination because it speaks to the whole point of Period Ten - "unlock talent"Ummm yeah... so... that's really it for this one! Enjoy!

January 26, 2012: Fabulously Female

In my life, I have come across some of the most inspiring women. I am lucky to be surrounded by girls who are talented, confident, creative, smart, athletic and hysterical. My grandmother, my mother, my sister and all of my close girl-friends have these characteristics. I often wonder how I could spread the word to girls everywhere that YOU can make a difference, YOU can be great! Well, my brother-in-law was perusing a skiing website and sent me a link to She Jumps.org. He texted me the site and said "seems cool and women with similar goals as you - check it out if you get a chance." So... I did!


I played around on that site for a while and got inspired, not only to get back on my snowboard, but to find more sites that empower girls. Maybe the word is already getting out and it's like a girl revolution! haha! So, while watching one of my favorite YouTube channels (if not my absolute favorite) ThreadBanger, I saw this video:


As you can see it references "I AM THAT GIRL." So, naturally, I visited the I AM THAT GIRL site and found that it is also all about empowering girls to be leaders and to be their best! I looked into starting a chapter but it looks like that is only available for colleges. Hmmmfff. I emailed the director to see if there is any chance that it will start in communities and even high schools? We shall see.

(Disclaimer: I noticed that I AM THAT GIRL does strongly support Planned Parenthood, which I am honestly on the fence about (honestly... sitting on the fence!) so my endorsement of the organization should not suggest anything about where I stand in the Pro-Life/Pro-Choice debate. If I am anything I am Pro-BeInformed)

Rock on girls! Please leave a comment if you know about other organizations that promote (excuse the cliche...) Girl Power! I am passionate about girls having confidence and pursuing their dreams.

January 25, 2012: Now this looks li(p)git!

Making your own lip balm is the perfect blend of art and science... which makes me a happy girl! As you are well aware, I have made two batches of lip balm prior to this one. Ironically my favorite so far was the first one... orange and peppermint flavor... silky smooth... Hmmm... Beginners luck?
What made this batch satisfying, however, is that I had professional containers! I ordered these containers on BrambleBerry.com. I also added more Shea butter to the recipe and slightly more of the color (fondant coloring - as explained in earlier post).


WELLL.... I started giving these away to my colleagues in school the following day and this led to an interesting conversation. I walked into the AP Environmental Science class and they were studying toxicology. The teacher asked me to tell the class that I had been making my own lip balm and how I was doing that. I told them that I used beeswax, olive oil, sweet almond oil, Shea butter and fondant color/shimmer... the teacher mentioned that sometimes the icing coloring contains toxic chemicals! Yikes! Well I went on a wild goose chase (internet variety). Although the amount of fondant coloring that I used (LusterDust) was soooo small... I was still curious. After all, if I am making my own bath and body products, I want them to be natural and safe.
It is incredibly difficult to find out what is even in Luster Dust... Really... Just give it a try! One ingredient, carmine, is used in red Luster Dust... and many other red colored, well, anythings. This ingredient is isolated from beetles that feed on cacti ("dried female insect Coccus cacti (cochineal)")! Here is a great website for looking up cosmetic ingredients -especially when you don't have a clue what they are and can't even pronounce the names. 
I was grateful to have walked into the AP Environmental class when I did because I really did learn quite a bit in my search. The most important thing I got out of it though... Is that when all else fails... be informed. We have access to so much information. Always check, double check and cross-reference your sources. 
The AP Environmental class was watching this video. It is from The Story of Stuff Project. It is very informative and can be scary! While searching and learning though, I also found the critique of this video. I found the critique to be very intriguing also. So where many sites say that carmine is an unnatural and harmful ingredient... I am not sure that pigment produced by beetles can be called "unnatural"... Just sayin'. 
At the end of the day I concluded that I will do the best that I can to make my products as safe and natural as I possibly can. At the same time, I am not going to stir up a scare about products because they use big words in their ingredients. For example, olive oil is "Olea Europaea Fruit Oil" and Shea butter is "Butyrospermum Parkii." Hmmm.

Sunday, February 5, 2012

January 24, 2012: Picture Perfect

How exciting to have a camera that is appropriate for this day in age! I have truly been inspired by the photography that some of my students have done. I also grew up down the road from Peter's Valley Craft Center, of which my mom was the Director for many years. This led me to be surrounded by amazing artists. Among them was Bill Abranowitz (absolutely amazing... check him out!). Reluctantly I will share of the brilliant photographs that he took of me and my sister back in the day.

I have little experience in the area of photography but I truly admire and appreciate it as an art form. So my new camera will help me "play around" with photography a little better :). My first run with the new camera, fittingly, was done in and around Peters Valley. This is a truly fantastic place where artists come from all over the world to create, learn, teach and spread the joy of art. The physical aspect of Peters Valley, location, architecture, natural landscape, etc., holds a vast amount of history, which also draws people from all over. Peters Valley is right in the heart of the land that was confiscated during the Tocks Island Dam Project. It is truly worth the ride... even if you can't ride a bike there like me :)!

Below are the pictures that I took. The resolution is actually awesome but I had to make it smaller to upload the video. Enjoy!


January 23, 2012: Happy Braid-Day to Me!

Oh yes... on this day I turned 31 (YIKES!). Thank God I can honestly say that I have quite a bit to show for my 31 years of life so far :) More to come! For my birthday I went to NYC with my mom for the evening for dinner and... some serious jewelry supply shopping! Our favorite place to go is Metalliferous. Unfortunately it is not open on weekends so we decided this was the perfect day. We also visited another favorite - Beads World at Broadway and 38th. Finally, before boarding the train to head home... we went to get me a NEW CAMERA!! Which I plan to use to take quality pictures of myself. No, not real. I will be taking pictures of the things that I create as well as my nephews, memorable moments, family, friends, landscapes, etc! Cannot wait! Stay tuned.

So when I returned from the B-day extravaganza, I was quick to use some of my new clamp-ends and magnet clasps. These two wrap bracelets are made with copper-colored satin cord. One is done using the braid technique described in the January 22nd post. The other is a 4-part braid with a chain weaving in and out of the stitches. Both are closed with magnetic clasps that I have mentioned in other posts.

January 22, 2012: A tail of leather

First, let me apologize for the late posting! Where have two weeks gone!? Honestly... these two weeks have been quite a test of my ability to pull this off. Between a birthday, grading and going quite a bit above and beyond what I owe my district (but I am truly happy to do it!!).... I have had to scrounge time to create much less actually update Period Ten. But here I am :) and I am hoping to see the Giants win the Super Bowl later so let's do this....


So, as I have mentioned before, I really enjoy using the beat up leather from old belts. It just has at the look and feel that you can not get from new leather that you might order new. This leather is actually from the same belt that my "wrap-it-up" bracelets were made from... and there's still plenty to go! This braid looks similar to a fishtail braid that I use in my hair (how to tutorial). Previously, I did not know how to get this look with other material (than hair). I found this tutorial on... what else?... Pinterest. It shows you how to do this with paracord, which is used by the military, firefighters, law enforcement, etc. I will follow up with a story about a student who taught me all about paracord at a later date (when I make a paracord creation!). I chose to use the leather strips that I love so much :) 
The closure for this bracelet was the most difficult part. I ended up using a vintage clip-on earring finding as a hook. Check out the close-up photo.